Door Seal Replacement
The seal components referred to herein are contained in kits K28 0005R (for 60" machines) or K36 0003R (for 72" machines).
- Remove old seal from the door cavity and carefully pull air tubing out of inner door so as not to cut tubing.
- Remove as much as possible of the old adhesive from the rubber filler strip inside door cavity.
- Carefully remove old seal from the air tubing fittings and attach new seal.
- Carefully stretch new seal around door and into cavity. Because the new seal is fabric reinforced it is slightly narrower than the old style rubber seal; the wall is thinner and it does not stretch as easily. It will therefore feel much tighter than the all rubber seal when stretching it over the edge of the door.
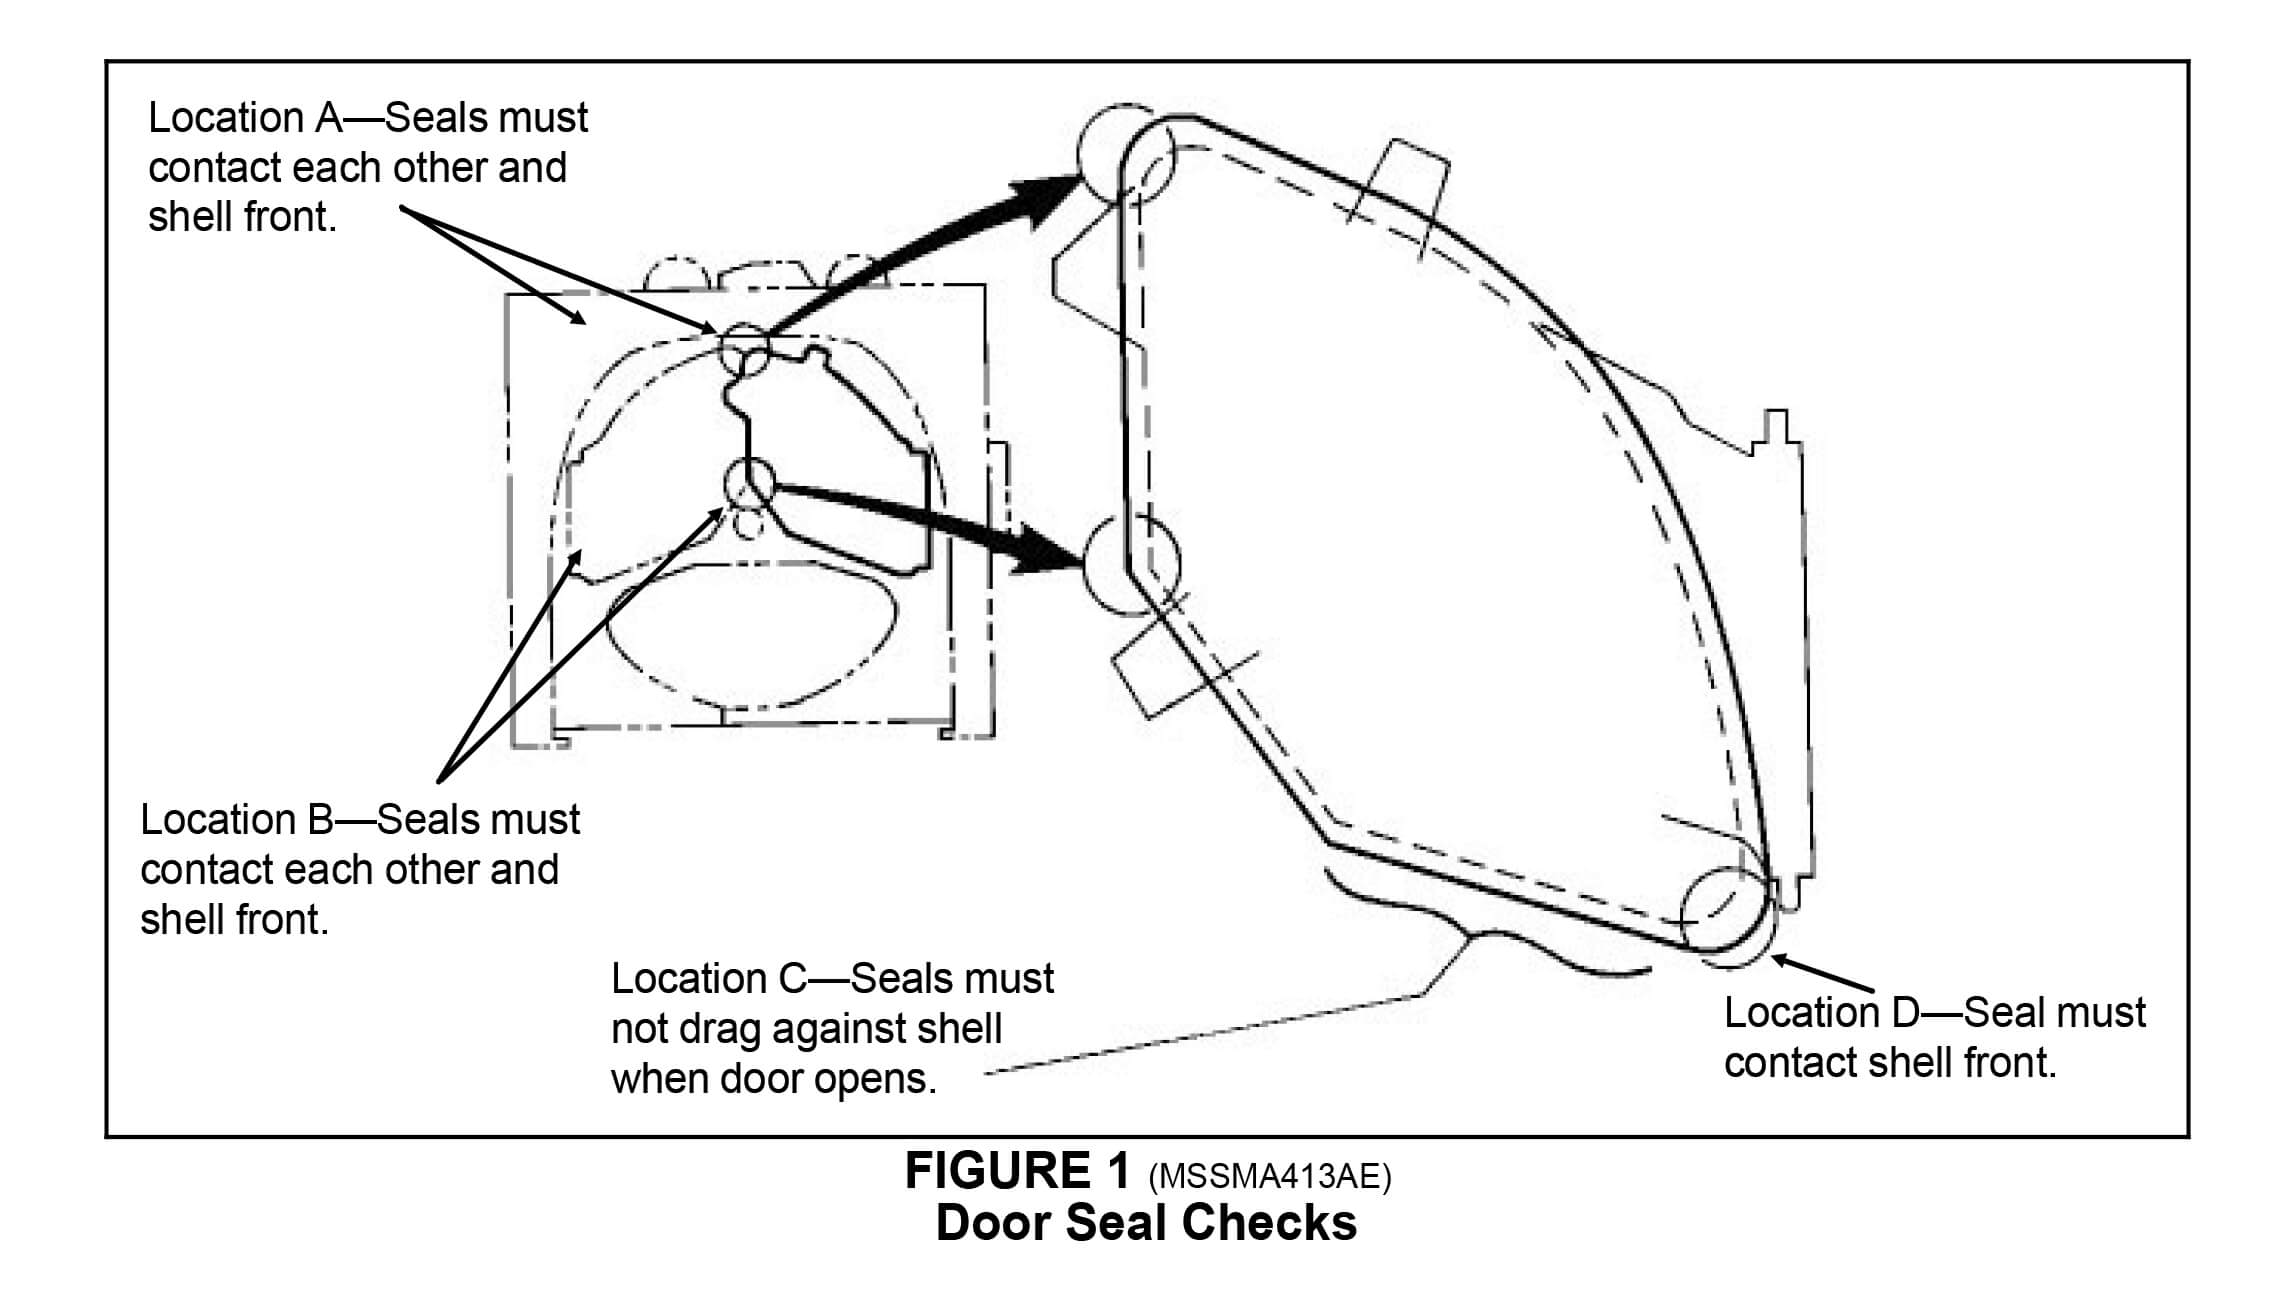
- After new seal is fitted and aligned into the door cavity, close both doors and inflate. Check to see that seals contact each other along the seam between the doors and that the seal contacts the shell front all around. To check this, attempt to slide a piece of paper between these surfaces.
- If the seal does not contact the shell at locations A or D (see FIGURE 1), open the doors and stretch the seal toward these points.
- If seals do not contact each other or the shell front in other areas, install rubber shims (part number 02 175267) between seal and filler strip as required to bring the seal further out from the door. Use adhesive (part number 20C015A) to attach shims to filler strip.
- If seals do not contact each other at locations A and B, (see FIGURE 1), then at these points, glue tapered patches (part number 02 175134), as required, to the outside of seal (using adhesive 20C080C) to add thickness.
- After seal has been completely fitted, roll seal up on one side, and with a small brush, paint adhesive (part number 20C015A) on filler strip to hold seal in place.
Door Seal — Preventive Maintenance
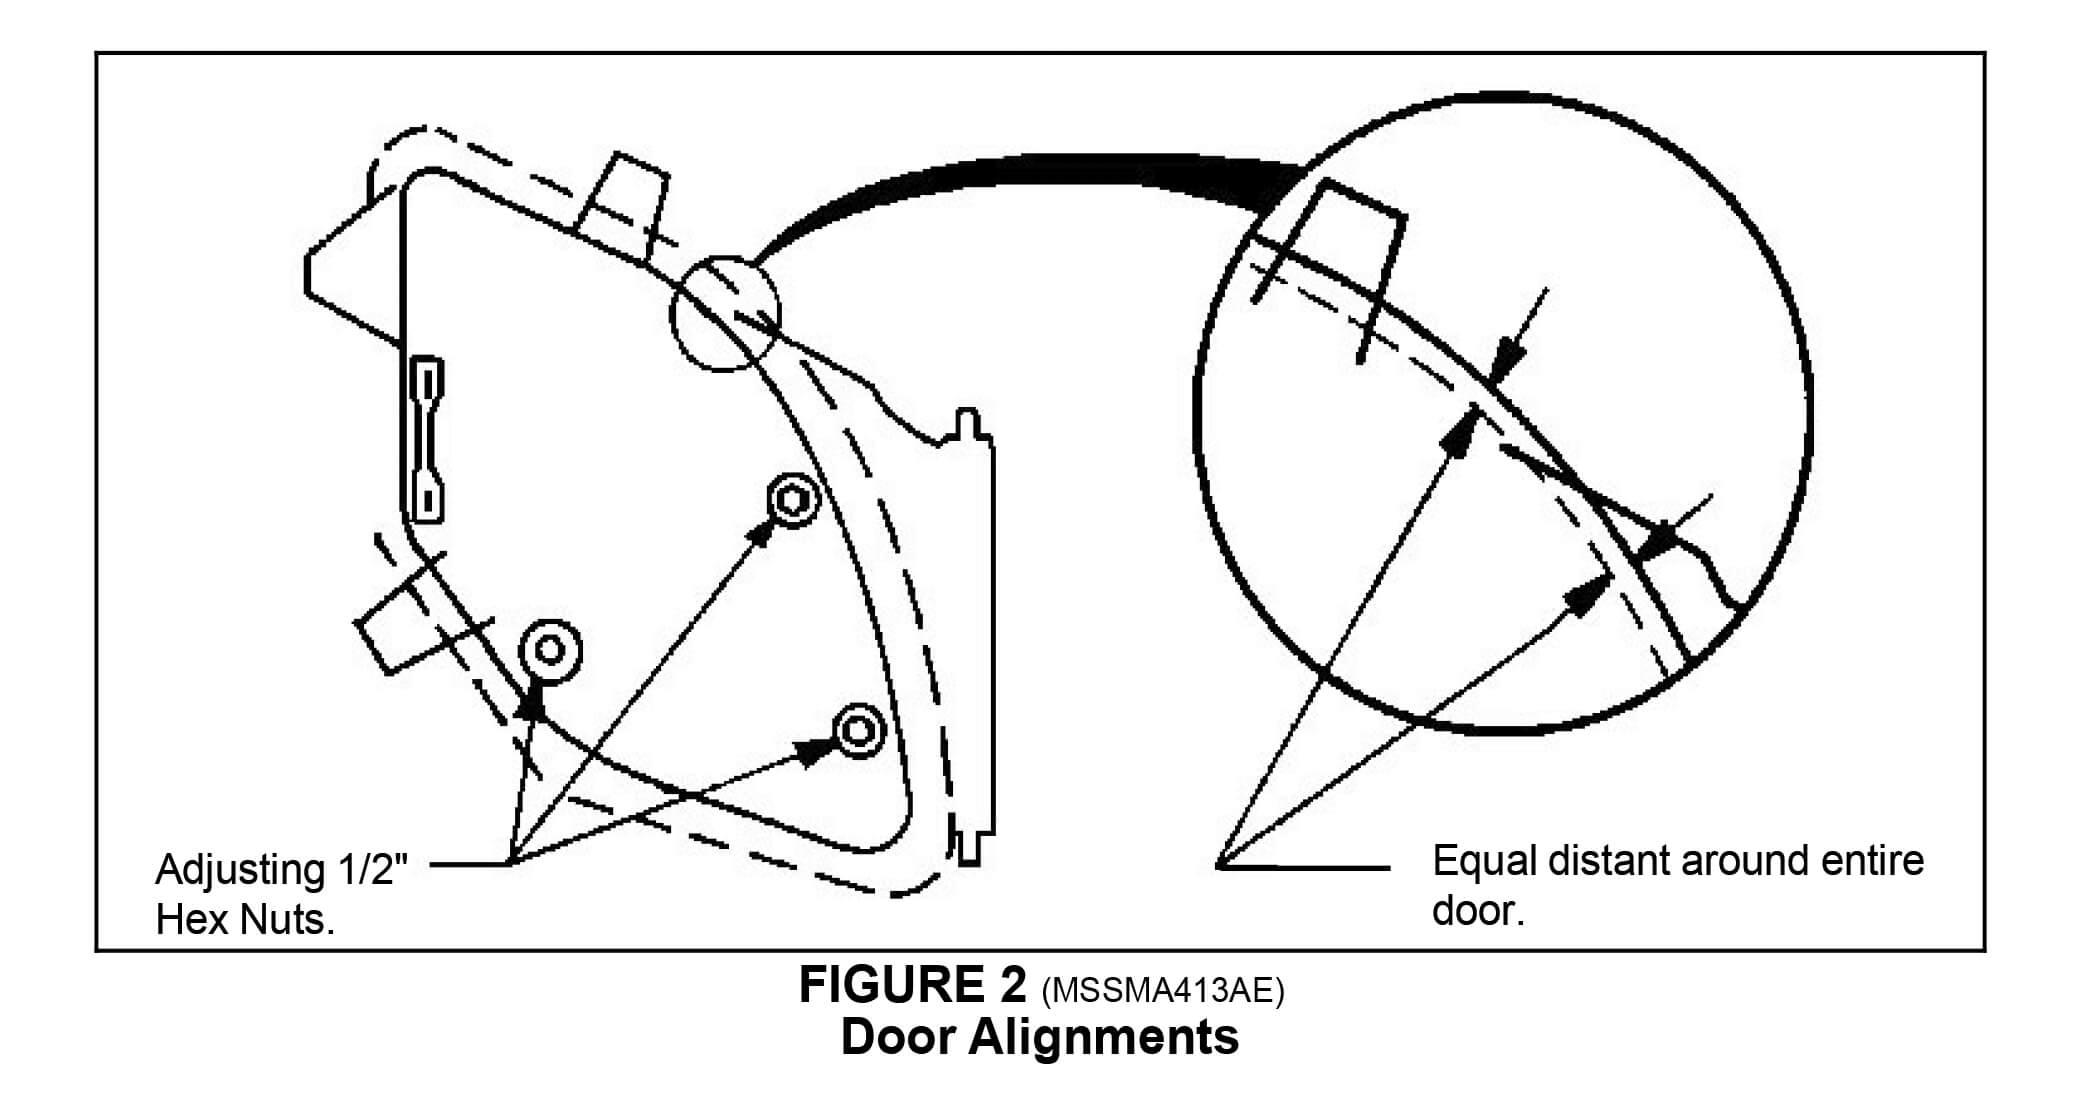
Check Door Alignment About the Shell Opening
Each door must be centered in its respective shell front opening. If the doors are not centered, the inflatable door seals will drag on the sealing edge of the shell front as the doors are opened and closed. The doors can be moved in any direction for centering by loosening the 1/2" hex cap nuts which hold the door assembly to the hinge cross brace as shown below.
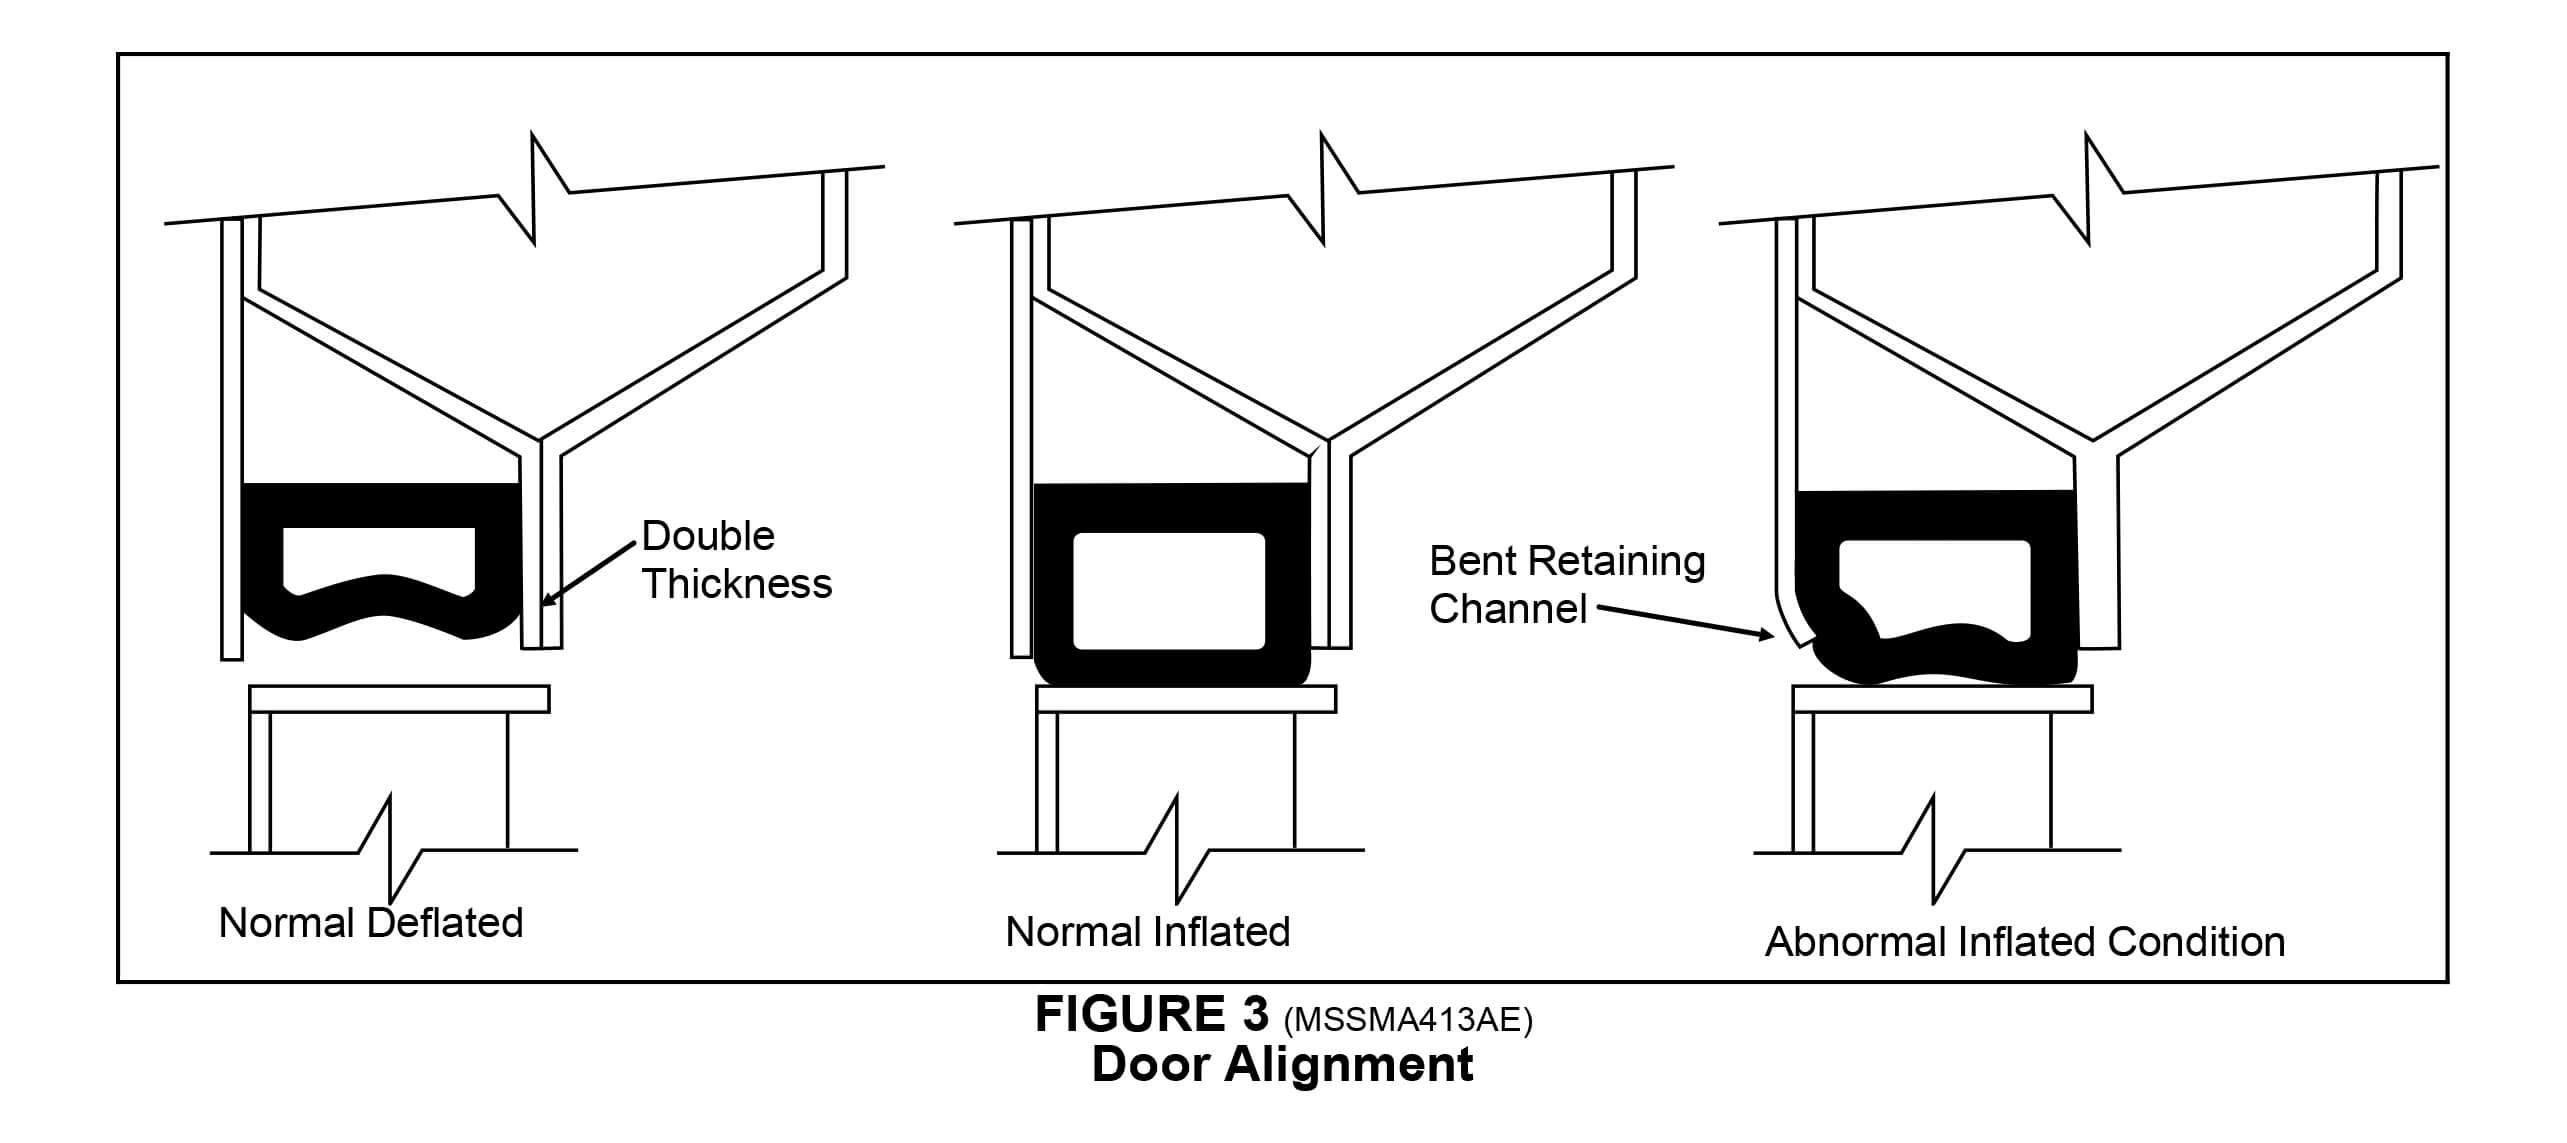
Check Condition of Door Seal Channel
Be certain the sides of the channel in which the door seal fits are straight and that mainly the inner edge is not bent. See FIGURE 3 below. Because outer edge is double thickness it is not likely to be bent out of shape. But it is possible for the inner edge to become bent as shown.
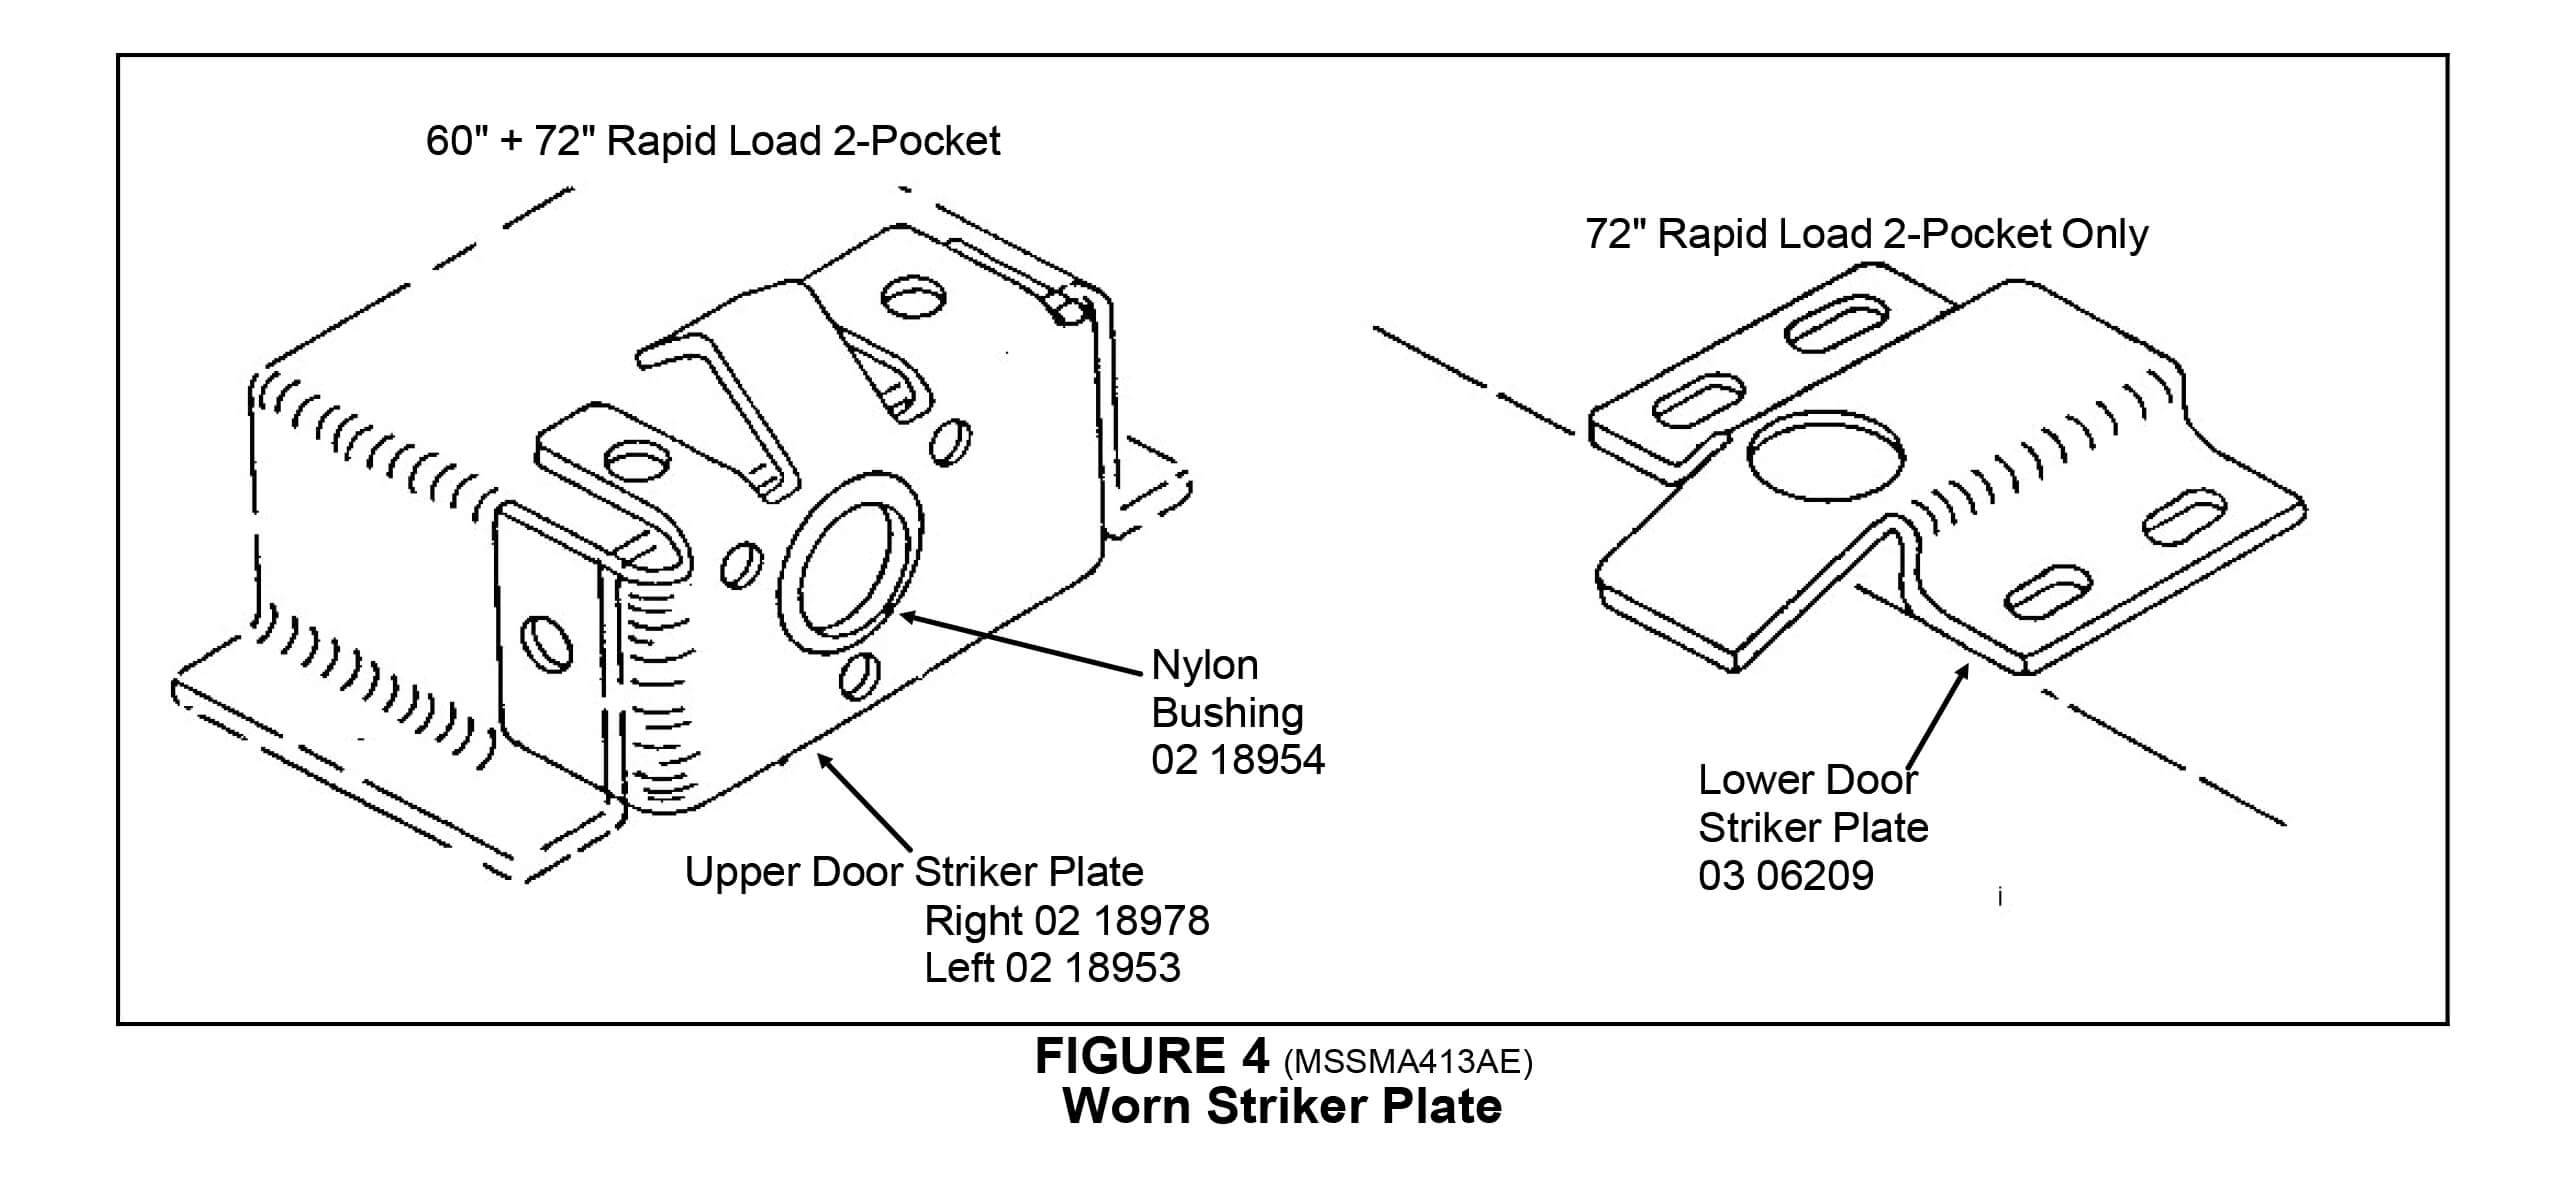
Replace Worn Striker Plates
Each of the outer doors are securely held in the closed position by air latches. These air latches snap into striker plates bolted to the shell front. If the hole in these striker plates becomes worn, the shell doors will be allowed to move while the machine is in operation. It will look as though the doors are “breathing.” This will cause rapid wear and premature seal failure. Striker plate components are shown below.
Check Door Alignment In and Out
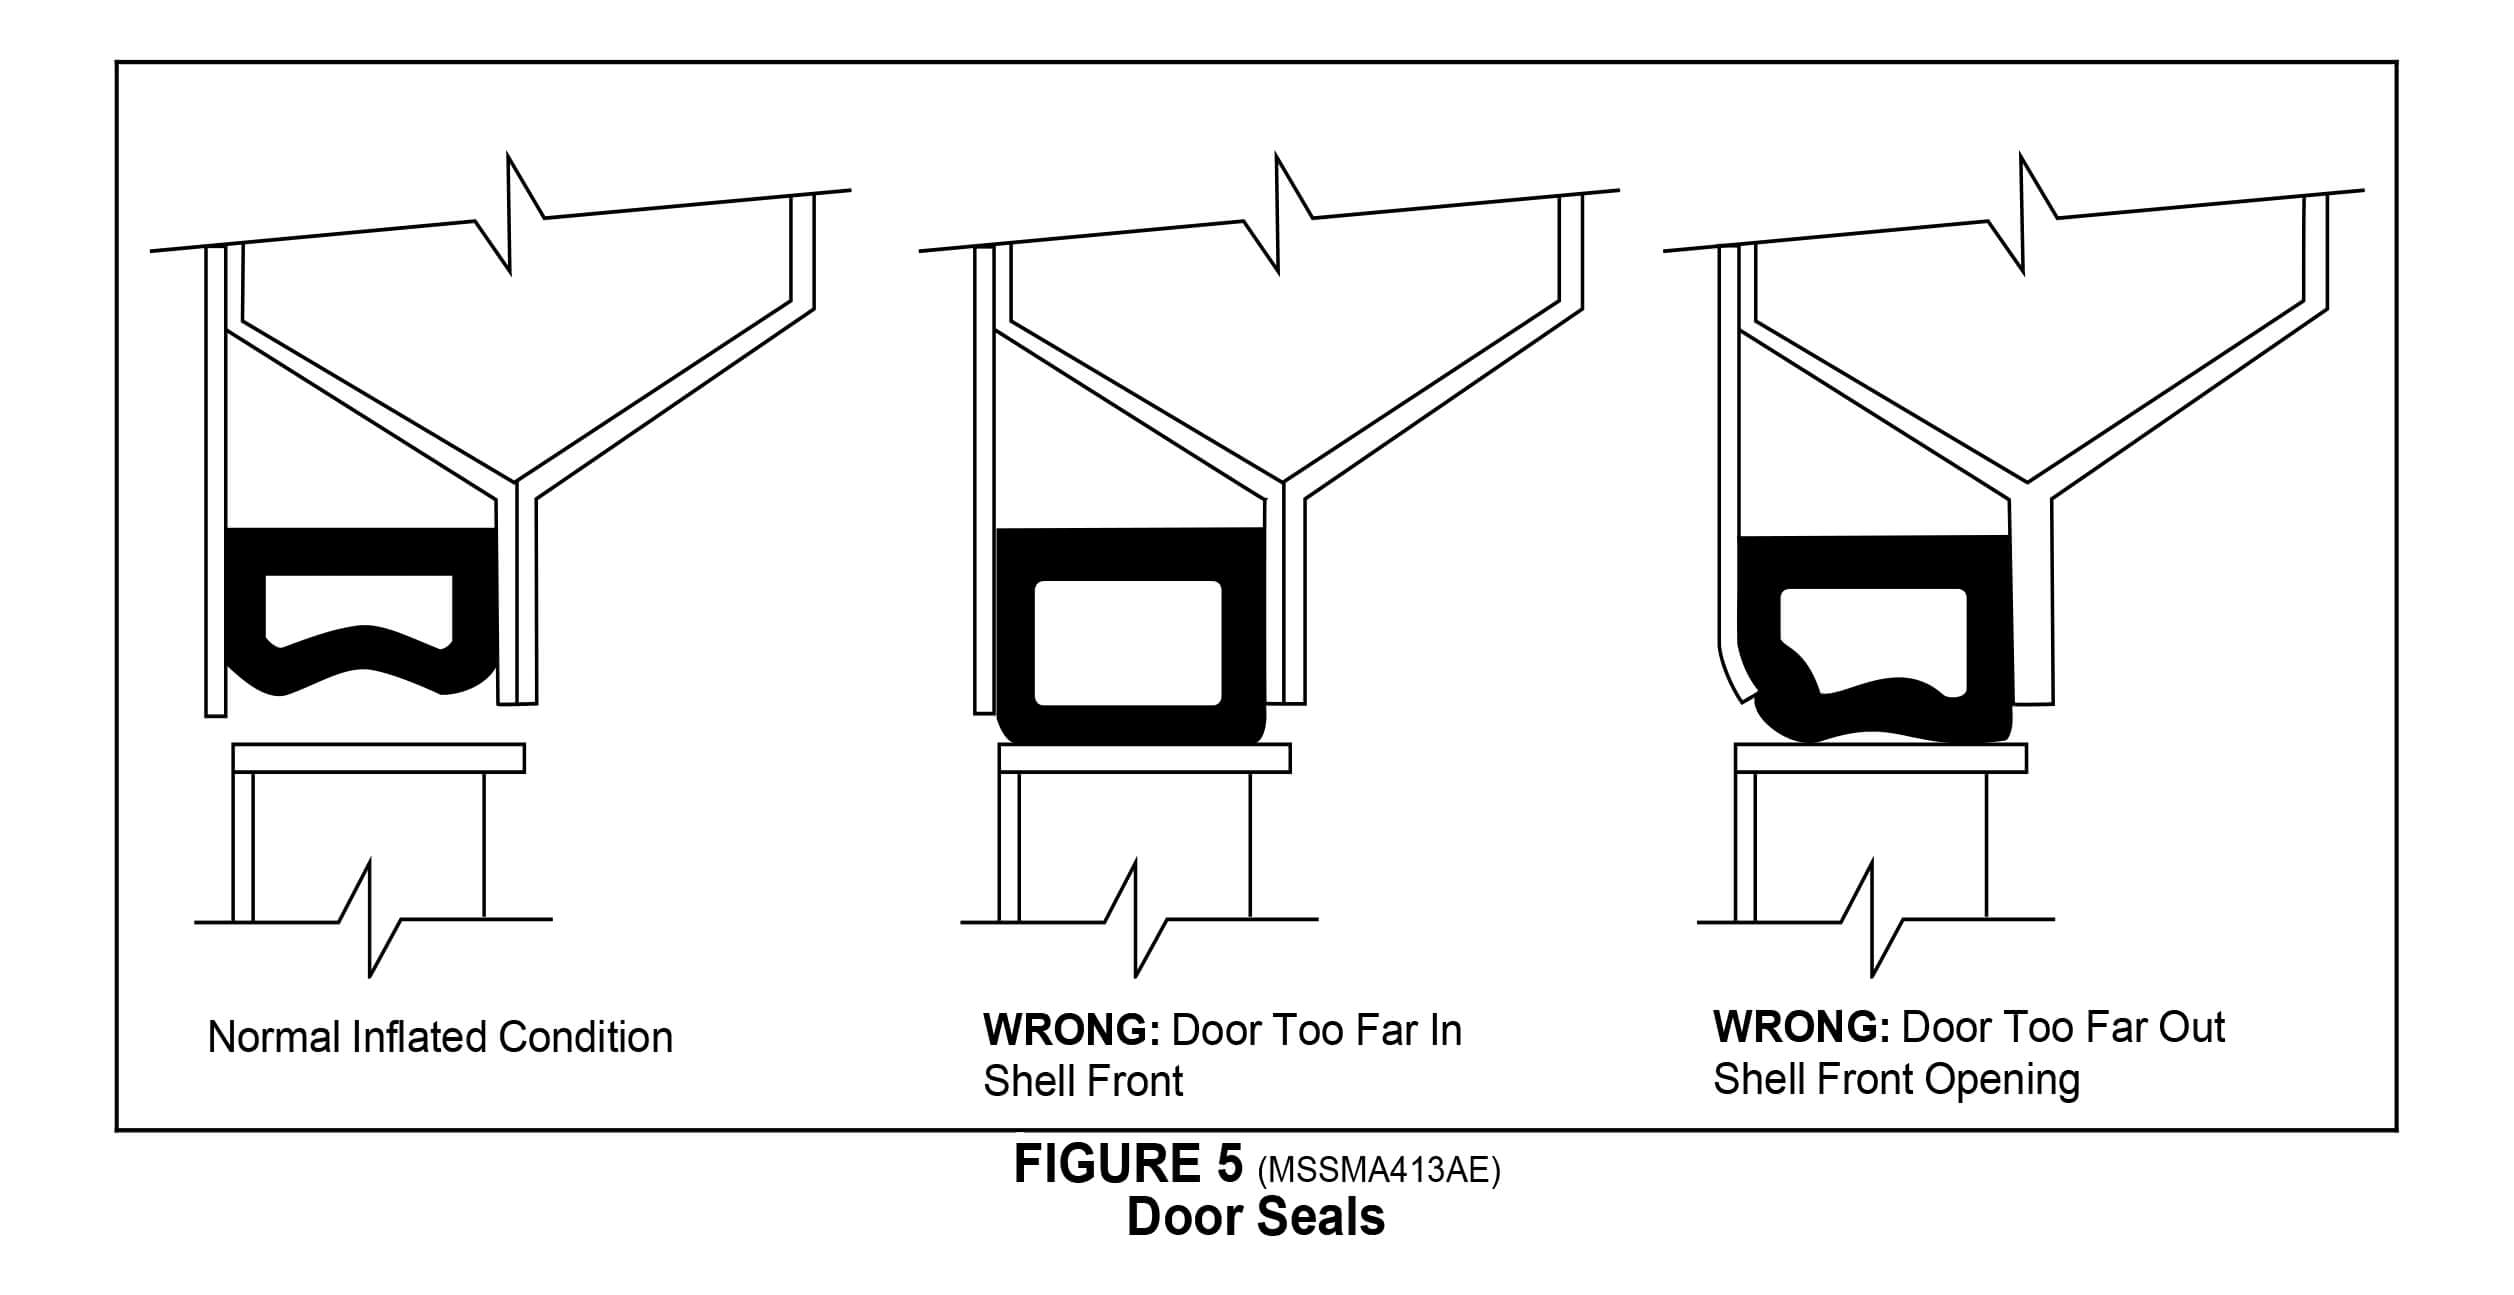
Misalignment of the doors in and out of the shell front opening can be most often attributed to worn striker plates as described above. The doors should be adjusted so that, with one door open and one door closed, the closed door’s inflatable seal channel will be centered on the shell front sealing surface when viewed edgewise (see FIGURE 5). If the door latch mechanism is loose, worn, or mismounted the door can travel too far into the machine, with the result that the inflatable seal can protrude past the door channel and the shell front sealing surface and be scissored when the door is reopened.
Check Seal Air Pressure
Air pressure on these inflatable door seals should be set and maintained at 25 to 28 PSI. Too high air pressure will cause blowouts and too low air pressure will cause not enough contact between seal and shell front, thus movement and rapid wear. Kit K28 0011, which contains a fixed at 25 to 28 PSI regulator, plus a pressure gauge is available from the Milnor® factory. If yours is inoperative, it should be replaced.
Check Door Bumper
Be sure large rubber bumper (part number 60C075) on right hand door is in place and not worn.
Seal Vacuum Pump Feature
Since approximately June of 1980, all production machines have a vacuum pump which delays the opening of the door by 7.5 seconds and during that time literally sucks the air from the inflatable door seal. This is the single greatest extender of the life of the inflatable door seal. This feature is retrofitable to all 60" and 72" WE2 machines manufactured prior to June 1980. Order retrofit kit, part number K28 0013.
