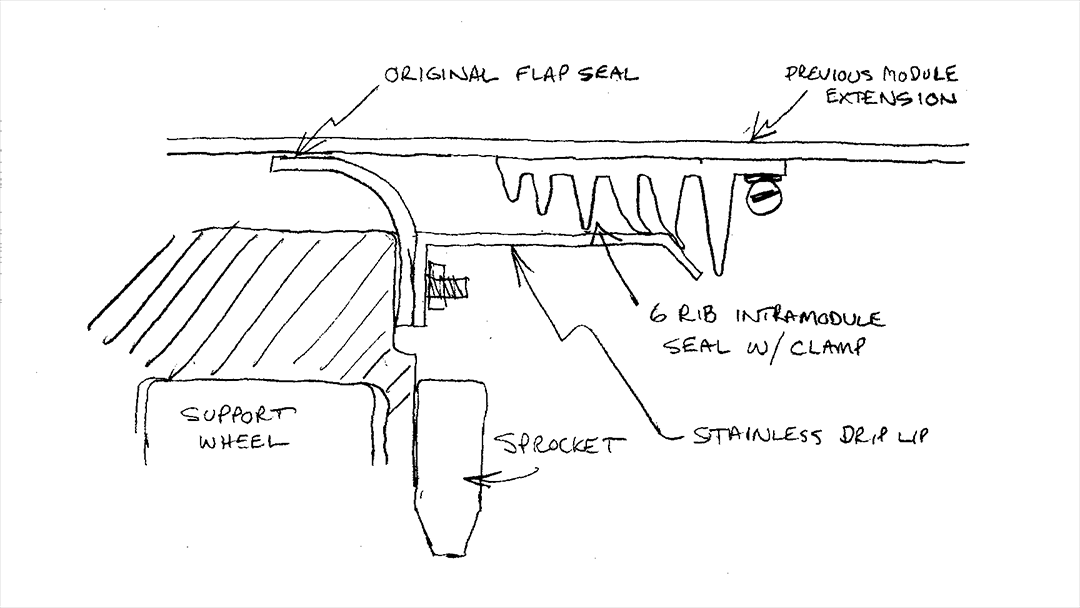
Please see the attached sketch. The seal provided with this kit is intended to fill the gap between the male extension from the exit of a middle mod and the drip lip on the entry end of the next section. Installation time for this seal is about 45 minutes.
The original flap seal should be left in position! It is not necessary to remove the drip lip if there is no leak between the drip lip and the original flap seal. If there is a leak the drip lip can be unbolted and the rubber seal removed from between the drip lip and the support ring. Then, after cleaning the surfaces, the drip lip ring can be re-installed using silicone sealant between the drip lip ring and the support ring. If any of the studs are broken then they can remain unused if the two adjacent studs are in tact. The ring should be able to seal and be retained by half of the fasteners originally used.
The purpose of the new seal is to prevent water from splashing out of the gap and onto the chain or sprocket. The seal will allow a drip to pass by and fall between the chains and into the drain pit or collection pan.
The seal must be cut to length. After wrapping the seal around the CBW extension ring mark the cut line and cut as needed. The seal should butt together at the ends when properly cut.
The seal is designed to penetrate the drip lip area until contact is made completely around the drip lip on one of the 6 ribs. This will allow for the least amount of friction on the seal from the drip lip.
So, if a few ribs of the seal are not under the drip lip then this is OK.From this picture, the 6 rib seal can slide to the right thus allowing one or more of the ribs to not make contact with the drip lip. Only engage as many ribs as needed to complete the seal to the drip lip. This helps reduce friction between the seal and the drip lip and prevents the seal from being pulled from under the clamp over time.
Install the seal so the cut ends are at top dead center. Wrap the band clamp around the end of the seal and when in position, clamp the seal firmly.